The Best Gluten Free Rice Flour Pizza Dough
Pizza lovers rejoice! This gluten-free version of pizza dough that creates light and fluffy pizza crust is a kitchen miracle! This Rice Flour Pizza Dough is truly the best and will fast become a family favorite! In addition to pizza crust this dough can also be used to make flatbreads and tortillas!
**This post was originally shared on July 13, 2013 – which means I’m updating it nearly 10 years later in 2023, doesn’t that seem like a crazy long time ago for this little blog to have been up & running?!?! **
There are very few recipes that I am this EXCITED to share with you!! Many of your have been asking for a gluten free pizza crust and gluten free tortilla… and I’ve created ONE DOUGH that does it all!
Initially, I created this dough to be a gluten, dairy and egg free crust for pizza… and I use the term “pizza” lightly since I had no intention of topping it with mozzarella cheese, let along tomato sauce! … I first used this gluten-free pizza dough it to make a pesto flat bread (I was craving something crispy and doughy).
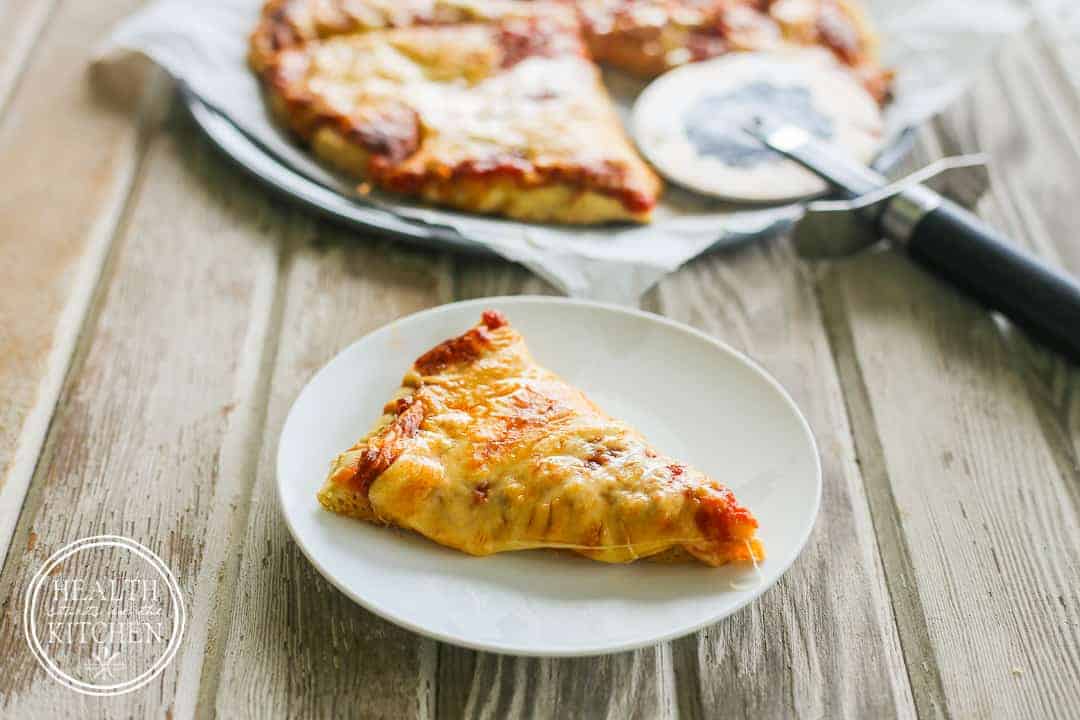
After testing this recipe several other ways, I’m so impressed with this easy recipe and its versatility and wheat-like-properties, I just had to have a homemade pizza night ASAP!
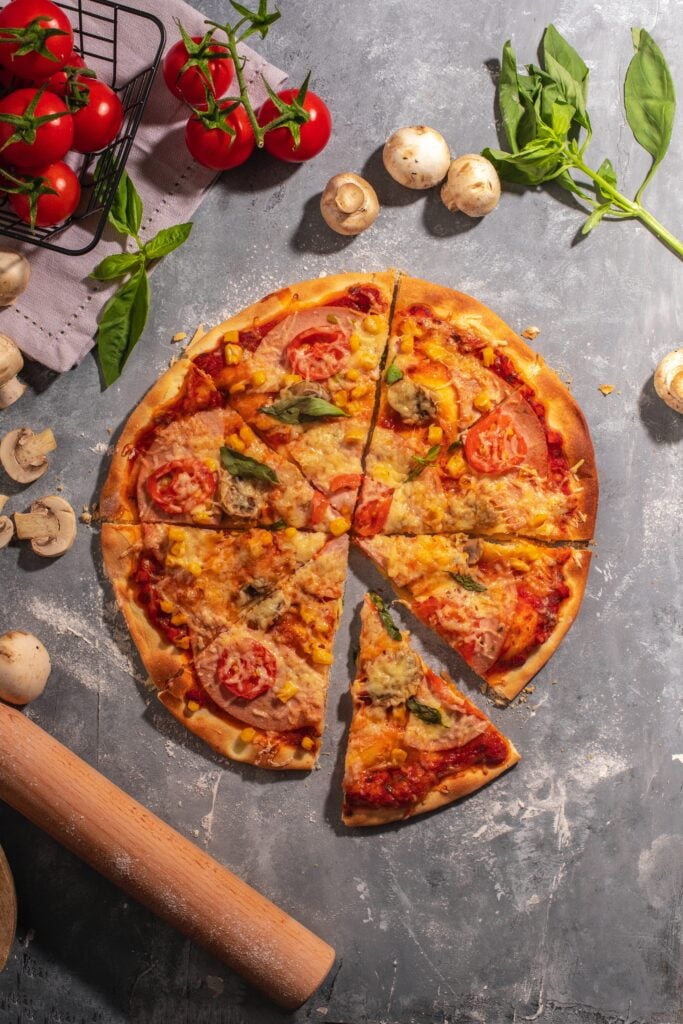
OH! It also tastes AWESOME, with the perfect chewy, light and crispy texture!
Rice Flour Pizza Dough Ingredients
If you are new to Gluten Free baking this might seem like exotic ingredients to make this gluten free flour blend, but for those of us who have been GF for many years, these alternative gluten-free flour (s) are a pantry staple!
- white rice flour
- Sweet Rice Flour
- Tapioca Starch
- xanthan gum
- Active Dry Yeast
- Sea Salt
- Honey
- Coconut Oil (or olive oil)
- Warm Water
How to make Rice Flour Pizza Dough
In the bowl of your stand mixer, fitted with your whisk attachment, combine your dry ingredients (rice flours, tapioca starch, xanthan gum, yeast, salt) with the honey and fat… mix well on low.
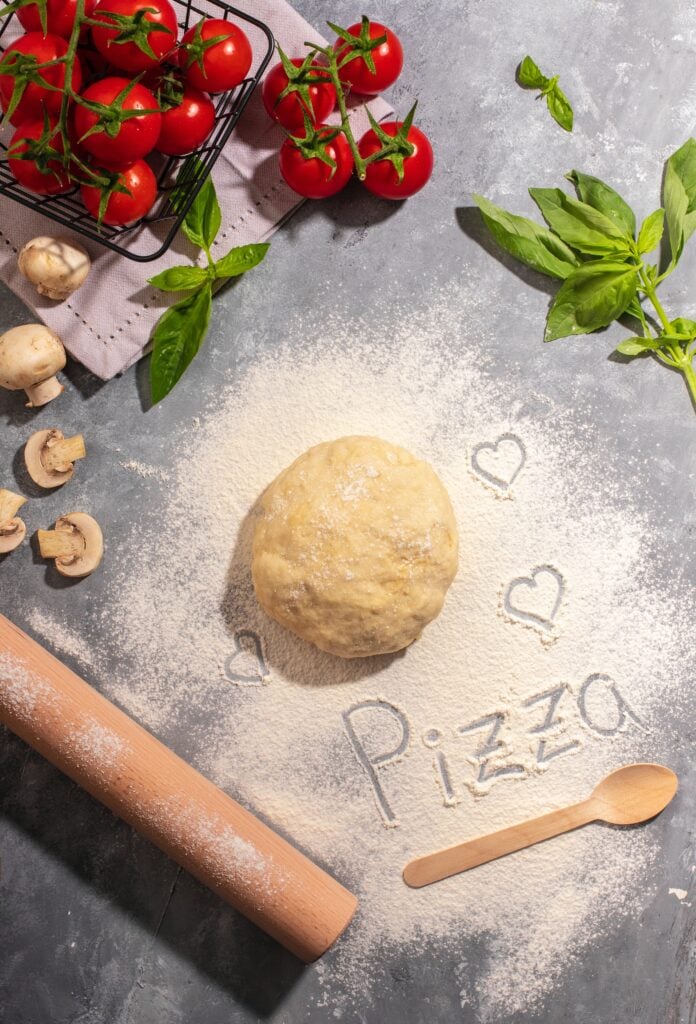
Slowly add in warm water into the yeast mixture, continue mixing on low until everything is well combined. Increase the speed to medium and mix until the dough forms a ball around the whisk. If the dough remains crumbly or lumpy add in additional warm water 1T at a time, until the dough forms a ball in the large bowl of the mixer. (room temperature water will need longer time to rest)
Increase the speed to high and mix for 3 minutes, the dough will be smooth and sticky – it will be stuck on the whisk too. Let dough rest for 15 minutes. You can also store your pre-made gluten-free pizza dough recipe in the fridge for up to 48 hours prior to rolling out.
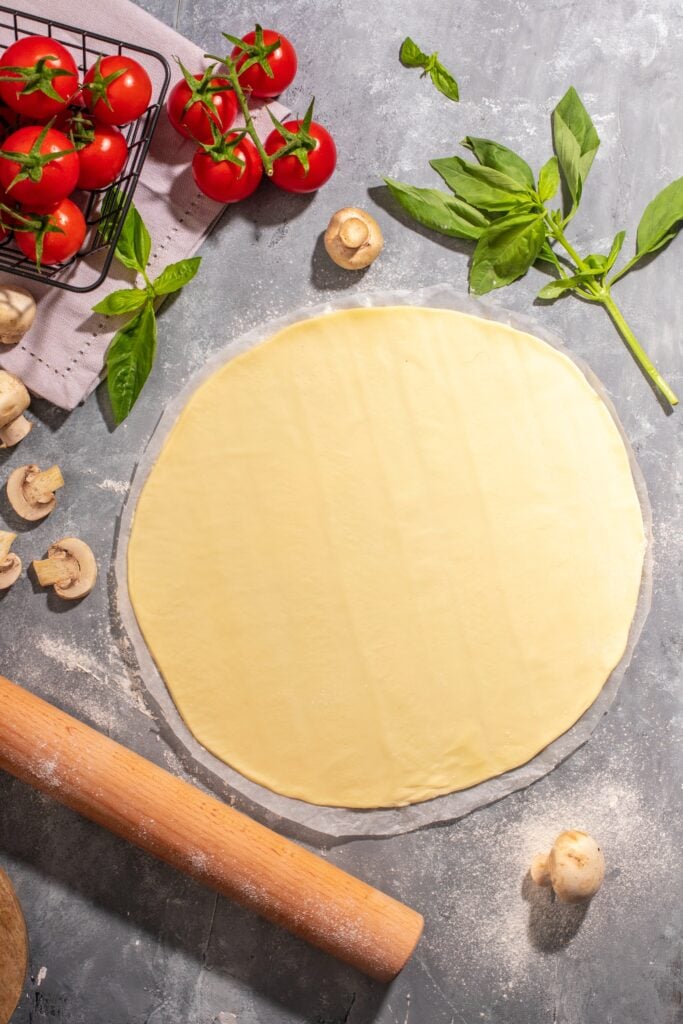
Divide your dough into 8 equal portions and roll out into 7-8 in circles on a surface dusted with additional sweet rice flour. Your prepared circles can be stacked between layers of unbleached parchment paper on a baking sheet. You can also use a tortilla press to “press” your dough into rounds (just like we make corn tortillas, click HERE for my recipe)
For Grilled Pizza/Flat Breads: Heat grill to high. Lightly brush your crusts with fat.. Place on your grill and just “grill” until lightly brown on each side. Remove your grilled crust (you can freeze crusts between layers of parchment paper for to use later) top with toppings of your choice (and taste!) Then return to the grill to heat/melt your toppings. Be careful not to burn your crust!!
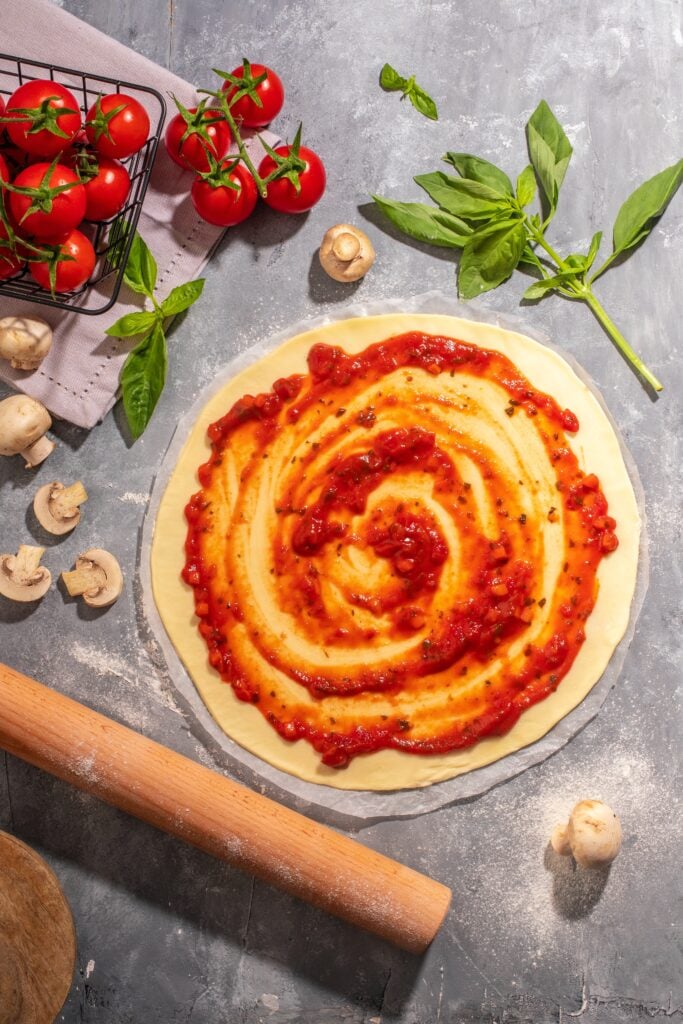
For Baked Pizza/Flat Breads: Heat oven to 450 with pizza stone or cast iron pizza pan… Brush each side of your thin crusts of dough with fat, Pre-cook each crust for a few minutes per side, just until lightly browned.. remove from the oven (you can freeze crusts between layers of parchment paper for to use later) top with toppings of your choice like pizza sauce and then return to the oven heat/melt your toppings. Be careful not to burn your crust!!
For Tortillas: Heat a cast iron griddle/skillet over medium/high heat. Using little to no fat, cook each side of your tortilla dough just until very very lightly golden brown.. you don’t want them to be crispy, just cooked. They’ll have light brown spots on them, and will be pliable. They will keep in the fridge wrapped in plastic wrap or a gallon size bag for a week. To reheat, wrap in foil with a damp paper towel and place in a 250 degree oven.
Rice Flour Pizza Dough FAQs
Is Rice Flour Pizza Dough Diary Free?
Yes, this Rice Flour Pizza Dough recipe is dairy-free! Feel free to top this gluten-free pizza crust recipe with dairy free cheese of your choice.
Is this Rice Flour Pizza Dough Egg Free?
Yes, this rice flour pizza dough recipe is egg free.
Is Rice Flour Pizza Dough Vegetarian/Vegan?
Unlike other gluten-free pizza recipes when you use this rice flour pizza dough as your base you can rest assured that your pizza is fully vegetarian & vegan – as long as you keep your toppings animal-free too!
What can I substitute for the rice flour in this pizza dough?
The key to this recipe is using the gluten-free flour blend as I’ve developed for the perfect gluten-free crust. If you feel like experimenting with other GF flours such as brown rice flour, almond flour, potato starch, chickpea flour, etc. Please come back & comment with substitutions that worked or didn’t to help others who may be interested in your results.
Can I use instant yeast instead of dry active yeast?
Although I have not tested this recipe with instant yeast, I should work great. Let me know if you try this substitution!
This easy gluten-free pizza crust will make pizza night a delicious event for the whole family, not only those on a gluten-free diet or with celiac disease.
IF you like this Rice Flour Pizza Dough Recipe, Try these other Gluten-Free Recipes next:
- Gluten Free White Chocolate Macadamia Nut Cookies
- Perfect Paleo Tortillas {Grain Free & Gluten Free}
- Healthy Gluten Free Breakfast Muffins
- Easy Gluten Free Crackers with Feta & Sun-Dried Tomatoes Recipe
- Gluten Free Blue Corn Muffins with Salted Honey Ghee

The Best Gluten Free Rice Flour Pizza Dough Recipe
Equipment
Ingredients
- 1 cup white rice flour
- 1/2 cup Sweet Rice Flour
- 1/2 cup Tapioca Starch
- 2 teaspoon xanthan gum
- 1 tablespoon Dry Active Yeast
- 1 teaspoon Sea Salt
- 1/2 teaspoon Honey
- 2 tablespoon Coconut Oil
- 3/4 to 1 cup Water, filtered heated to 110 degrees F
Instructions
- In the bowl of your stand mixer, fitted with your whisk attachment, combine rice flours, tapioca starch, xanthan gum, yeast, salt, honey and fat… mix well on low.
- Slowly add in 3/4c hot water, continue mixing on low until everything is well combined. Increase the speed to medium and mix until the dough forms a ball around the whisk. If the dough remains crumbly or lumpy add in additional hot water 1T at a time until the dough forms a ball.
- Increase the speed to high and mix for 3 minutes, the dough will be smooth and sticky – it will be stuck on the whisk too.
- Let dough rest for 15 minutes. You can also store your pre-made dough in the fridge for up to 48 hours prior to rolling out.
- Divide your dough into 8 equal portions and roll out into 7-8in circles on a surface dusted with additional sweet rice flour.
- Your prepared circles can be stacked between layers of unbleached parchment paper. You can also use a tortilla press to "press" your dough into rounds (just like we make corn tortillas)
For Baked Pizza/Flat Breads:
- Heat oven to 450 with pizza stone or cast iron pizza pan… Brush each side of your dough with fat, Pre-cook each crust for a few minutes per side, just until lightly browned.. remove from the oven (you can freeze crusts between layers of parchment paper for to use later) top with toppings of your choice and then return to the oven heat/melt your toppings. Be careful not to burn your crust!!
For Tortillas:
- Heat a cast iron griddle/skillet over medium/high heat. Using little to no fat, cook each side of your tortilla dough just until very very lightly brown.. you don't want them to be crispy, just cooked. They'll have light brown spots on them, and will be pliable. They will keep in the fridge wrapped in plastic wrap or a gallon size bag for a week. To reheat, wrap in foil with a damp paper towel and place in a 250 degree oven.
For Grilled Pizza/Flat Breads:
- Heat grill to high. Lightly brush your crusts with fat.. Place on your grill and just "grill" until lightly brown on each side. Remove your grilled crust (you can freeze crusts between layers of parchment paper for to use later) top with toppings of your choice and then return to the grill to heat/melt your toppings. Be careful not to burn your crust!!

Yummy and ez, thx
Oh. My gosh. I just fixed this recipe tonight for pizza crust and it was absolutely fabulous! Only a year or so after perfecting my conventional pizza crust, I learned that I have a gluten sensitivity. So it was back to the drawing board. I’ve tried mixes and other recipes and this- THIS!- this is it! Delicious! As per my usual, I didn’t follow the recipe exactly. I only had brown rice flour on hand, and I had potato starch, not tapioca, that I swapped in. (I had tapioca flour, but went with the potato starch) I also used quick rise yeast. I pressed it out rather thick and cooked it on an air-bake sheet, which kept things thick and doughy just like I like them. I can’t wait to try the recipe again for tortillas/wraps! Thanks so much for the fabulous recipe, once again. You’re such a great resource!
I tried this out and it didn’t turn out as “fluffy” looking as yours. It was more like a thin flatbread. Any ideas? I thought I followed the recipe exactly! It was still tasty but I was looking for a little more of a thick crust. Love your posts!
It can depend on how thick/thin you roll them and how your yeast works… I prefer mine thin (they do bubble up so that they can almost be seaprated like pita breads 🙂
Looks great! I can’t wait to try it. One question, tho, do you really use the whisk for your stand mixer? Seems like the bread hook would be more suited.
Yes! You use the whisk.. I tried both ways that the whisk works better since it’s not a wheat dough.